Embarking on Your Pole Dancing Journey: 5 Must-Know Tips for Beginners

Pole dancing is a captivating blend of fitness, artistry, and self-expression that has gained popularity worldwide. If you’re a beginner considering taking your first steps into the world of pole dance, there are some essential things you should know to make your journey smooth and enjoyable. In this blog post, we’ll share five crucial tips to help beginners kickstart their pole dancing adventure with confidence and enthusiasm.

1. Choose the Right Studio or Instructor: Finding the right studio or instructor is paramount for beginners. Look for a reputable pole dance studio with certified instructors who prioritize safety and proper technique. Consider factors like class size, teaching style, and class offerings to find the best fit for you.

2. Wear the Right Attire: Proper attire is essential for a successful pole dancing experience. Beginners should wear comfortable workout clothes that allow for unrestricted movement. Shorts are typically recommended, as they provide better skin contact with the pole. Avoid wearing lotion on the day of your class, as it can make your skin slippery.

3. Expect Some Initial Discomfort: Pole dancing may cause some initial discomfort as your body gets accustomed to the unique movements and the pole itself. You may experience minor bruising or skin irritation. Don’t be discouraged; these are common and temporary. Over time, your body will adapt, and discomfort will decrease.

4. Embrace the Learning Curve: Pole dancing is a skill that takes time to develop. It’s perfectly normal for beginners to struggle with certain moves and techniques. Embrace the learning curve and stay patient with yourself. Celebrate small victories along the way, as progress in pole dance can be incredibly rewarding.

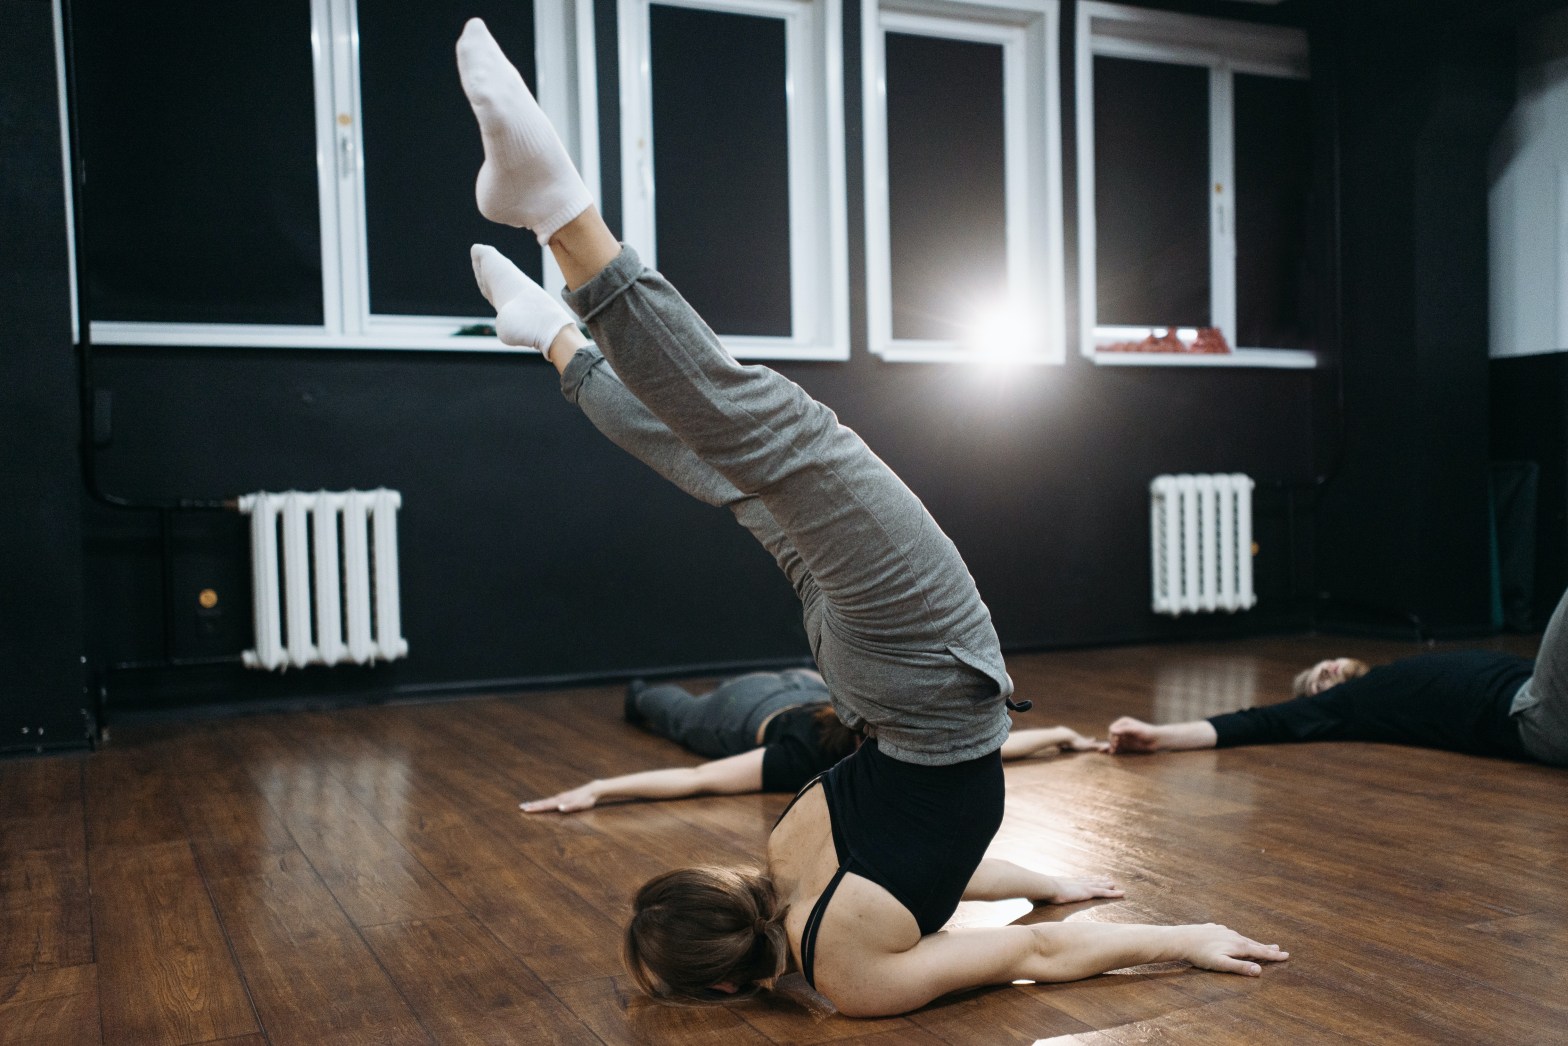
5. Build Strength and Flexibility: Pole dancing requires a combination of strength and flexibility. Beginners should incorporate strength training and stretching into their routine to enhance their performance and reduce the risk of injury. Yoga, bodyweight exercises, and resistance training can all complement your pole dance practice.

Bonus Tip: Create a Home Practice Space: Consider setting up a small practice space at home if possible. Having access to a pole or a sturdy vertical bar can help you practice between classes and improve your skills faster.

Conclusion: Pole dancing is a thrilling and empowering journey that offers a unique blend of fitness and self-expression. As a beginner, it’s important to choose the right studio or instructor, wear the appropriate attire, and expect some initial discomfort. Embrace the learning curve, stay patient with yourself, and work on building both strength and flexibility. With dedication and practice, you’ll embark on an incredible pole dancing adventure that will not only transform your body but also boost your confidence and creativity.

Unlocking Back Extension: Exercises and Stretches for a Healthier Spine

Pole-ates Playhouse – Your Hub for Mindful Movement

Back extension, the ability to arch your spine backward, is crucial for maintaining a healthy and flexible spine. Whether you’re a seasoned athlete, a Pilates enthusiast, or someone looking to alleviate back pain, improving your back extension can lead to a more comfortable and mobile body. In this blog post, we’ll explore a series of exercises and stretches to help you unlock greater back extension.

Understanding Back Extension

Back extension refers to the movement that arches your spine backward. It’s the opposite of flexion, where the spine rounds forward. A well-balanced spine should be able to move comfortably in both directions, and practicing back extension can help maintain spinal health and flexibility.

Exercises to Improve Back Extension

  1. Cobra Pose (Bhujangasana): Lie face down, palms by your shoulders. Press your hands into the floor and lift your chest, keeping your pelvis grounded. Extend your arms as far as comfortable, arching your upper back. Hold for 15-30 seconds and release.
  2. Bridge Pose (Setu Bandha Sarvangasana): Lie on your back with knees bent and feet flat on the floor. Lift your hips toward the ceiling, engaging your glutes and lower back. Keep your arms flat on the floor. Hold for 20-30 seconds, then lower slowly.
  3. Camel Pose (Ustrasana): Kneel with knees hip-width apart. Reach back and hold your heels with your hands. Push your hips forward, arching your back. Keep your neck long. Hold for 15-30 seconds.
  4. Child’s Pose (Balasana): Sit back on your heels with arms extended forward. Lower your forehead to the mat and reach your arms as far as possible. This stretch releases tension in the lower back.

Stretches to Enhance Back Extension

  1. Cat-Cow Stretch: Begin on your hands and knees. Arch your back upward (cat) and then lower it (cow) while inhaling and exhaling, respectively. Repeat for 1-2 minutes.
  2. Sphinx Pose: Lie on your belly with your elbows under your shoulders. Press your forearms into the floor to lift your chest while keeping your pelvis grounded. Hold for 20-30 seconds.
  3. Child’s Pose with Side Stretch: From Child’s Pose, walk your hands to one side, stretching the opposite side of your back. Hold for 15-30 seconds on each side.

Tips for Safe Back Extension

  • Warm-Up: Always warm up before attempting back extension exercises to prevent injury.
  • Proper Form: Maintain proper alignment and listen to your body. Avoid forcing your back into an extreme arch.
  • Breathing: Focus on deep, controlled breathing while performing these exercises and stretches. Breath control enhances relaxation and flexibility.
  • Gradual Progression: Start with gentle movements and gradually increase the intensity and duration of your exercises as your flexibility improves.

In Conclusion

Back extension is a vital component of spinal health and flexibility. By incorporating these exercises and stretches into your routine and practicing them mindfully, you can unlock greater back extension, alleviate back pain, and maintain a more mobile and comfortable spine.

Your Top Questions About Pilates Answered!

Pilates is a fitness method that has gained immense popularity for its ability to improve strength, flexibility, and overall well-being. If you’re new to Pilates or curious about what it entails, you probably have a range of questions. In this blog post, we’ll answer some of the most common questions about Pilates to help you gain a better understanding of this transformative practice.

1. What Is Pilates, Exactly? Pilates is a low-impact exercise method that focuses on building core strength, improving flexibility, and enhancing body awareness. Developed by Joseph Pilates in the early 20th century, it incorporates a series of controlled movements and exercises performed on a mat or using specialized equipment like the reformer.

2. What Are the Benefits of Pilates? Pilates offers a wide range of benefits, including improved posture, enhanced core strength, increased flexibility, better balance, and reduced risk of injury. It can also promote relaxation, stress relief, and improved mental well-being.

3. Is Pilates Suitable for All Fitness Levels? Yes, Pilates is inclusive and adaptable to various fitness levels. Whether you’re a beginner or an experienced athlete, Pilates can be customized to match your abilities and goals. It’s particularly beneficial for those with specific fitness needs or physical limitations.

4. Do I Need Special Equipment for Pilates? While Pilates can be practiced with just a mat, specialized equipment like the reformer, Cadillac, and barrel can add variety and intensity to your workouts. Many Pilates studios offer classes that incorporate these machines, but you can start with mat-based Pilates if you prefer.

5. Will Pilates Help Me Lose Weight? Pilates is not primarily a weight loss program, but it can be a valuable component of a weight loss journey. It improves muscle tone and increases calorie burn, which can contribute to weight loss when combined with a balanced diet and regular exercise.

6. How Often Should I Practice Pilates? The frequency of your Pilates practice depends on your goals and schedule. For optimal results, aim for at least two to three sessions per week. Consistency is key, so choose a routine that you can maintain over time.

7. What Should I Wear for a Pilates Class? Wear comfortable, form-fitting workout attire that allows for ease of movement. Avoid overly loose clothing, as it can make it challenging for your instructor to assess your form.

8. Can Pilates Help with Posture Improvement? Yes, Pilates is excellent for posture improvement. It strengthens the muscles responsible for good posture, such as the core, back, and shoulders, helping you maintain an upright and balanced position.

Pilates is a versatile and transformative exercise method that offers a wide range of benefits for individuals of all fitness levels. Whether you’re looking to improve strength, flexibility, posture, or overall well-being, Pilates can be a valuable addition to your fitness routine. If you have more specific questions or are interested in exploring Pilates further, consider trying a class at Poleates Playhouse to experience the benefits firsthand and receive guidance from experienced instructors.

Finding Your Pilates Frequency: How Often Should You Practice?

Pilates is a renowned exercise system that offers a multitude of benefits, including improved flexibility, increased core strength, and enhanced posture. If you’re new to Pilates or have been practicing for a while, you may be wondering, “How often should I be doing Pilates?” The answer depends on your goals, your fitness level, and your schedule. In this blog post, we’ll explore the factors that influence how often you should practice Pilates and provide some general guidelines to help you find the right frequency for your needs.

1. Your Goals

Your reasons for doing Pilates play a significant role in determining how often you should practice. Are you looking to enhance your overall fitness, relieve stress, rehabilitate an injury, or improve your athletic performance? Different goals may require different practice frequencies.

  • General Fitness: If you’re primarily interested in Pilates for overall fitness, a consistent practice of 2-3 times per week is generally recommended. This frequency can help you maintain a strong, supple body and reap the full benefits of Pilates.
  • Rehabilitation: If you’re using Pilates to recover from an injury, consult with a healthcare professional or physical therapist to determine the ideal frequency for your specific condition. They may recommend more frequent sessions initially and then tapering off as you improve.
  • Performance Enhancement: Athletes and individuals seeking to improve their athletic performance may incorporate Pilates into their training schedules, often practicing 3-4 times per week. More frequent sessions can help build the necessary strength and flexibility.

2. Your Fitness Level

Your current fitness level also plays a role in determining how often you should practice Pilates. Beginners may start with 1-2 sessions per week and gradually increase the frequency as they become more experienced and stronger. Those who are more advanced can engage in more frequent sessions if desired.

3. Schedule and Lifestyle

Your daily schedule and lifestyle are crucial considerations. The beauty of Pilates is its flexibility – you can choose to practice at a studio, gym, or in the comfort of your own home. If you have a busy schedule, shorter, more frequent sessions can be just as effective as longer, less frequent ones. Choose a schedule that aligns with your lifestyle and preferences.

4. Recovery Days

Incorporating rest and recovery days into your Pilates routine is essential. Give your body the time it needs to recover and adapt to the demands of your practice. Rest allows your muscles and joints to heal and grow stronger. Depending on your frequency, one or two rest days each week is a good rule of thumb.

5. Listen to Your Body

Ultimately, the key to determining the right frequency for your Pilates practice is listening to your body. Pay attention to how you feel, both physically and mentally. If you’re consistently fatigued or experiencing discomfort, it may be a sign to reduce your frequency temporarily.

In conclusion, there’s no one-size-fits-all answer to the question of how often you should do Pilates. It depends on your goals, fitness level, and lifestyle. To find your ideal frequency, consult with a qualified Pilates instructor or trainer who can offer personalized guidance. Most importantly, remember that Pilates is a journey, and consistency is more important than the number of sessions per week. So, create a schedule that works for you and enjoy the countless benefits Pilates has to offer.

Discovering Balance and Harmony: The Principles of Pilates

Pilates, an exercise method developed by Joseph Pilates, has gained widespread recognition for its holistic approach to fitness, strength, and body awareness. At its core, Pilates is more than just a series of exercises; it’s a philosophy that emphasizes mindful movement, alignment, and a deep connection between body and mind. In this blog post, we’ll delve into the fundamental principles that underpin the Pilates method, guiding practitioners on a journey toward enhanced well-being and vitality.

1. Concentration:

Concentration is the cornerstone of Pilates. Each movement is performed with focused attention, allowing you to connect with your body’s sensations, alignment, and muscle engagement. By concentrating on the present moment, you cultivate mindfulness and create a space for improved body awareness.

2. Centering:

Pilates places great emphasis on the body’s center—commonly referred to as the “powerhouse.” This area, which includes the muscles of the abdomen, lower back, hips, and buttocks, is where movement originates and radiates. By strengthening the center, you create a stable foundation for all movements, promoting balanced muscle development and preventing injury.

3. Control:

Control is the essence of Pilates. Movements are performed deliberately and with precision, focusing on quality rather than quantity. Practitioners prioritize controlled, fluid motions over momentum, ensuring that every muscle is engaged throughout the movement.

4. Precision:

Precision goes hand in hand with control. Pilates encourages attention to detail in every movement, ensuring that each exercise is executed with proper alignment, muscle engagement, and breath. By refining your technique, you maximize the effectiveness of each movement and minimize the risk of strain.

5. Breath:

Breath is the bridge between body and mind in Pilates. The breath is used to facilitate movement, oxygenate muscles, and enhance body awareness. Practitioners learn to synchronize breath with movement, allowing for a deeper connection between the two.

6. Flow:

Pilates is characterized by its seamless flow of movement. Exercises are designed to transition smoothly from one to another, fostering a sense of rhythm and continuity. Flow promotes grace and fluidity in your movements, preventing stiffness and promoting flexibility.

7. Routine:

Consistency is key in Pilates. Regular practice helps you develop muscle memory, refine technique, and see progressive improvements over time. Incorporating Pilates into your routine—even in short sessions—allows you to reap the benefits of increased strength, flexibility, and body awareness.

8. Integration:

Pilates aims to create harmony within the body. By integrating mind and body, you develop a deep awareness of movement patterns, imbalances, and areas of tension. This integration promotes better posture, coordination, and overall well-being.

Applying the Principles:

Incorporating the principles of Pilates into your practice enhances its effectiveness and transforms it into a mindful movement experience. Whether you’re practicing mat exercises or using specialized equipment like the Reformer or Cadillac, these principles serve as your guiding compass, helping you navigate your Pilates journey with intention and purpose.

The principles of Pilates create a framework that extends beyond the physical realm, guiding practitioners toward holistic well-being and self-discovery. As you embrace concentration, centering, control, precision, breath, flow, routine, and integration, you embark on a path of improved physicality, mental clarity, and harmony.

So step onto your mat, connect with your body, and embark on a transformative journey that goes beyond the exercises—into a realm of balanced strength, heightened awareness, and a profound connection between body and mind.

Discovering Your Pilates Sanctuary: A Guide to Finding the Right Studio

Pilates, with its focus on mindful movement, strength, and flexibility, has become a popular choice for fitness enthusiasts seeking a holistic approach to wellness. Choosing the right Pilates studio is essential for your practice, as it sets the tone for your journey of growth and self-discovery. In this blog post, we’ll explore the factors to consider when finding the perfect Pilates studio to fit your needs and goals.

1. Location and Convenience:

A key consideration when selecting a Pilates studio is its location. Opt for a studio that is conveniently located to your home, workplace, or daily route. A studio that is easily accessible will make it more likely for you to attend classes consistently.

2. Instructor Qualifications:

The expertise and qualifications of the instructors can greatly impact your Pilates experience. Look for studios with certified Pilates instructors who have received training from reputable Pilates organizations. Experienced instructors can provide proper guidance, correction, and support as you progress.

3. Class Variety:

Pilates offers a diverse range of exercises and variations. A quality studio should offer a variety of classes suitable for different levels, from beginner to advanced. This ensures that you can progress at your own pace and choose classes that align with your fitness goals.

4. Studio Atmosphere:

Visit potential studios to get a feel for the atmosphere. A welcoming and positive environment is crucial for an enjoyable experience. Pay attention to factors such as cleanliness, lighting, and overall ambiance.

5. Class Schedule and Flexibility:

Evaluate the class schedule to ensure it aligns with your availability. Studios that offer flexible class times and various scheduling options can accommodate different lifestyles and work schedules.

6. Equipment and Facilities:

Check the type and condition of the equipment available at the studio. High-quality Pilates equipment enhances your practice and provides better support. Well-maintained facilities contribute to a comfortable and safe workout environment.

7. Trial Classes:

Many studios offer trial classes or introductory packages. Take advantage of these opportunities to experience the teaching style, class structure, and overall vibe of the studio. It’s a great way to determine if the studio resonates with you.

8. Client Reviews and Recommendations:

Research online reviews and seek recommendations from friends or acquaintances who practice Pilates. Hearing about others’ experiences can provide insights into what to expect from a particular studio.

9. Alignment with Your Goals:

Consider your goals and intentions for practicing Pilates. Are you looking to build core strength, improve flexibility, alleviate back pain, or simply stay active? Choose a studio that aligns with your goals and offers classes that cater to your needs.

10. Cost and Value:

Evaluate the studio’s pricing structure and membership options. While cost is a factor, also consider the value you receive in terms of instructor expertise, class quality, and overall experience.

In Conclusion:

Finding the right Pilates studio is a significant step toward enhancing your wellness journey. By taking into account factors such as location, instructor qualifications, class variety, and studio atmosphere, you can create an environment that supports your growth, challenges you, and ultimately brings joy to your practice.

Remember, the right studio isn’t just a place to exercise; it’s a community that fosters camaraderie, growth, and self-discovery. Trust your instincts, explore your options, and embark on a Pilates journey that aligns perfectly with your goals and aspirations.

Mastering Inversions: Tips and Conditioning Exercises for Success in Pole Fitness

Inverting on the pole is an exhilarating feat that showcases your strength, technique, and determination in pole fitness. Whether you’re a beginner looking to conquer your first invert or an experienced pole dancer aiming for more advanced variations, a combination of proper technique and effective conditioning is essential. In this blog post, we’ll delve into valuable tips and conditioning exercises to help you master inversions with confidence.

Tips for Inverting Successfully:

  1. Build Core Strength: A strong core is the foundation for stable and controlled inversions. Incorporate exercises like planks, leg raises, and Russian twists into your routine to target your core muscles.
  2. Practice Consistently: Regular practice is key to improving your technique and building the necessary strength for inversions. Set aside dedicated time for pole sessions and conditioning exercises.
  3. Focus on Technique: Proper technique is vital for safe and effective inversions. Work with a qualified instructor to learn the correct hand placements, grip techniques, and body positioning for various inversion moves.
  4. Gradual Progression: Start with basic inversions and gradually progress to more advanced variations as your strength and technique improve. Mastering the fundamentals sets the stage for successful and injury-free inversions.
  5. Mindful Breathing: Breathing plays a significant role in maintaining control during inversions. Practice deep and controlled breathing to stay calm and centered while upside down.
  6. Use Spotters and Mats: When attempting new inversions, use spotters or crash mats for safety. Having a spotter can provide reassurance and assistance as you work on your technique.

Conditioning Exercises for Inversions:

  1. Hollow Body Holds: Lie on your back, engage your core, and lift your head, shoulders, and legs off the ground. Hold this position to build core strength and body control.
  2. Pike Leg Lifts: Hang from the pole and lift your legs in a pike position. Lower them with control and repeat to strengthen your hip flexors and lower abdominals.
  3. Negative Inversions: Start in an inverted tuck position and slowly lower your legs towards the ground. Use your core and back muscles to control the descent.
  4. Climbing Practice: Climbing the pole engages your upper body, core, and leg muscles. Regular climbing practice enhances your overall strength for inversions.
  5. Straddle-Ups: From a seated position on the floor, straddle your legs and use your core to lift yourself into an inverted position. Lower down with control and repeat.
  6. Resistance Band Exercises: Incorporate resistance bands for assisted inversions. Attach a band to the pole and use it for support as you practice lifting your legs.
  7. Forearm Plank Holds: Strengthen your core and upper body by holding a forearm plank. This exercise builds the stability needed for inverted poses.
  8. Leg Tucks: Hang from the pole and practice bringing your knees to your chest, mimicking the motion of tucking in for an inversion.

Remember Safety and Patience:

Safety should always be a priority in pole fitness. Work on inversions under the guidance of a certified instructor and progress at your own pace. Never rush the process; building strength and technique takes time.

Mastering inversions in pole fitness is a rewarding journey that combines strength, technique, and dedication. By following these tips and incorporating conditioning exercises into your routine, you’ll be well on your way to confidently conquering inversions and exploring the exciting world of upside-down pole dance.

So embrace the challenge, celebrate your progress, and enjoy the thrill of defying gravity in your pole fitness journey.

Shining on Stage: A Guide to Finding Pole Dancing Gigs

Pole dancing is a captivating art form that blends athleticism, grace, and self-expression. Whether you’re a seasoned pole dancer or a rising star, taking your passion from the studio to the stage is an exhilarating journey. Finding pole dancing gigs allows you to showcase your skills and connect with audiences who appreciate the artistry of your performance. In this blog post, we’ll guide you through the process of discovering and securing pole dancing gigs that bring your talent into the spotlight.

1. Build a Strong Portfolio:

Before you start looking for gigs, create a portfolio that showcases your pole dancing skills. Include high-quality photos and videos of your performances, highlighting your versatility and unique style. A visually appealing portfolio can make a powerful impression on potential clients.

2. Network within the Pole Community:

Connect with fellow pole dancers, instructors, and studio owners within your local pole dancing community. Attend workshops, events, and classes to build relationships and gain insights into potential gig opportunities. Networking can lead to recommendations and referrals that open doors to exciting performances.

3. Collaborate with Studios:

Local pole studios often organize showcases, workshops, and events. Reach out to studios in your area and express your interest in participating as a performer. Collaborating with studios not only provides you with performance opportunities but also strengthens your ties within the pole dancing community.

4. Attend Open Mics and Performance Nights:

Many cities host open mic nights, talent shows, or performance events at various venues. These events provide platforms for artists to showcase their talents, including pole dancing. Research local open mic nights or performance nights and inquire about the possibility of including pole dance in the lineup.

5. Explore Nightclubs and Entertainment Venues:

Nightclubs, bars, and entertainment venues often seek unique and captivating performances to enhance their events. Reach out to these venues to inquire about the possibility of performing pole dance routines during their themed nights or special events.

6. Contact Event Planners:

Event planners and organizers are always on the lookout for entertainment options that can add flair to their events. Reach out to event planning companies or individual event organizers and propose your pole dancing performances as a distinctive addition to their gatherings.

7. Showcase on Social Media:

Leverage the power of social media platforms to showcase your pole dancing skills. Regularly post photos, videos, and snippets of your performances. Use relevant hashtags and geotags to increase your visibility and attract the attention of potential clients who may be searching for unique entertainment options.

8. Create a Professional Website:

Having a professional website or online portfolio is an essential tool for promoting your pole dancing talent. Include information about your experience, performances, and contact details. A well-designed website showcases your professionalism and makes it easy for potential clients to reach out to you.

9. Reach Out to Event Planners:

Research local events, festivals, and gatherings that align with your performance style. Reach out to event planners and pitch your pole dancing routines as a captivating and memorable entertainment option. Be sure to highlight how your performances can enhance the event experience.

10. Keep Improving:

Continuously work on improving your pole dancing skills and expanding your repertoire of routines. The more versatile and skilled you become, the more attractive you’ll be to event organizers and clients looking for unique and captivating performances.

Finding pole dancing gigs requires a combination of networking, self-promotion, and a proactive approach. By building a strong portfolio, connecting with the pole dancing community, and exploring various venues and events, you can shine on stage and share your passion with enthusiastic audiences. Remember that persistence, professionalism, and a dash of creativity can help you secure the exciting opportunities you deserve.

So step into the limelight, showcase your talent, and let your pole dancing journey take you to stages where your artistry can truly shine.

Mastering the Art of Grip: Exploring Twisted Grip, True Grip, and Split Grip in Pole Dancing

Grip plays a pivotal role in the world of pole dancing, enabling dancers to execute breathtaking spins, gravity-defying tricks, and captivating routines. As a pole dancer, understanding and mastering various types of grip is essential for achieving both strength and grace on the pole. In this blog post, we’ll delve into three distinct types of grip—Twisted Grip, True Grip, and Split Grip—and explore how they enhance your pole dancing prowess.

1. Twisted Grip: Unveiling Elegance and Flexibility

Twisted Grip is characterized by the dancer’s hand placement—your inside hand is positioned with the thumb facing down, and the wrist slightly rotated inwards. This grip type exudes elegance and is often utilized in static spins and poses that emphasize elongation and flexibility.

Advantages of Twisted Grip:

  • Extended Lines: Twisted Grip lends itself to beautiful lines and elongated shapes, adding a touch of grace to your routines.
  • Spins and Holds: This grip is well-suited for spins and holds, enabling smooth transitions between moves.

2. True Grip: Unleashing Power and Control

True Grip, also known as Standard Grip, is the foundation of many pole moves. In this grip, the inside hand maintains a strong grip with the thumb on top and fingers below the pole. True Grip emphasizes control and stability, making it a fundamental grip for both beginners and experienced pole dancers.

Advantages of True Grip:

  • Controlled Movements: True Grip provides excellent control, allowing you to execute dynamic spins, holds, and transitions with precision.
  • Beginner-Friendly: This grip is often recommended for beginners, as it offers stability and builds the foundation for more advanced moves.

3. Split Grip: Balancing Strength and Flexibility

Split Grip combines the elements of Twisted Grip and True Grip. In this grip, your inside hand maintains a True Grip position, while the outside hand follows the Twisted Grip hand placement. Split Grip showcases the balance between strength and flexibility, enabling you to create visually stunning poses and transitions.

Advantages of Split Grip:

  • Versatility: Split Grip opens the door to a wide range of moves, from spins to inverted tricks, showcasing your versatility as a dancer.
  • Dramatic Poses: The combination of grips allows for dramatic, eye-catching poses that highlight both your strength and flexibility.

Incorporating Grip Types into Your Practice:

  • Warm-Up: Begin your practice by gently warming up your hands, wrists, and forearms. A proper warm-up enhances your grip strength and flexibility.
  • Mindful Transitions: Practice transitioning between different grip types to develop fluidity and ease in your movements.
  • Strength and Conditioning: Alongside your pole practice, engage in strength and conditioning exercises to enhance your grip endurance and overall upper body strength.
  • Proper Technique: Focus on proper technique and alignment while executing moves. This ensures safety and reduces the risk of injury.
  • Stretch and Flexibility: Incorporate stretching routines to improve wrist and shoulder flexibility, benefiting your execution of various grip types.

In Conclusion:

Mastering different types of grip in pole dancing elevates your performance and allows you to explore a diverse range of moves and combinations. Whether you’re seeking the elegance of Twisted Grip, the control of True Grip, or the balance of Split Grip, each grip type contributes to your growth as a skilled and expressive pole dancer.

So step onto the pole with confidence, embrace the art of grip, and let the interplay of strength, flexibility, and technique guide you towards creating mesmerizing routines that leave a lasting impression.

Stepping into Confidence: How to Break in New Heels for Pole Dancing

Pole dancing is a captivating art that combines strength, sensuality, and self-expression. And for those who love adding an extra touch of glamour and flair to their routines, dancing in heels is a thrilling choice. However, breaking in new heels for pole dancing requires a bit of patience and technique to ensure comfort and confidence in your performances. In this blog post, we’ll guide you through the process of breaking in your new heels and stepping onto the pole with grace and confidence.

Why Breaking in Heels Matters:

New heels can be stiff and uncomfortable, leading to blisters, pinching, and restricted movement. Breaking in your heels allows the materials to soften, adapt to your foot shape, and provide the flexibility needed for fluid pole dancing movements.

Step-by-Step Guide to Break in New Heels:

  1. Choose the Right Size: Ensure that your heels fit comfortably. They should be snug enough to stay in place but not so tight that they cause discomfort or restrict blood circulation.
  2. Remove Stickers and Protective Films: Don’t forget to peel off any stickers, labels, or protective films from the bottoms of your heels. These can hinder your grip on the pole and affect your balance.
  3. Wear Thick Socks: Put on a pair of thick socks and slip your feet into the heels. This gently stretches the shoe material and prevents excessive rubbing against your skin.
  4. Use a Hairdryer: Apply low heat using a hairdryer to the stiff parts of the heels. Keep the dryer moving to prevent overheating and melting. While the material is warm, flex and bend the heels to encourage them to soften.
  5. Toe Flexing: Gently flex your toes while wearing the heels to create more space in the toe box. This relieves pressure and prevents pinching.
  6. Leather Conditioner: If your heels are made of leather, consider using a leather conditioner to soften the material. Apply a small amount and gently massage it in.
  7. Score the Bottoms for Traction: Use a knife or sandpaper to score the bottoms of the heel tips. This improves traction, reducing the risk of slipping during your pole dance routine.
  8. Wear at Home: Begin by wearing your new heels for short periods at home. Walk around, practice basic pole moves, and get accustomed to the feel of the shoes.
  9. Rolling Your Feet: While sitting, gently roll your feet back and forth to flex and stretch the shoe material. This helps to mimic the natural movement of your feet while dancing.
  10. Stretching: If you experience tightness in specific areas, consider using a shoe stretcher or placing a bag of water inside the shoes and freezing them. As the water freezes and expands, it stretches the material.
  11. Practice in Sessions: Gradually increase the time you wear your heels during practice sessions. This allows your feet to adjust without causing discomfort.
  12. Protect Your Feet: To prevent blisters, consider using moleskin or silicone padding on areas that are prone to rubbing, such as the back of the heel and the top of the toes.

Tips for Dancing in Newly Broken-In Heels:

  1. Warm-Up: Begin your pole dance session with a thorough warm-up to get your blood flowing and your muscles prepared for movement.
  2. Practice Movement: Start with basic pole movements and spins to get used to the feel of the heels in motion.
  3. Strengthen Your Ankles: Incorporate ankle-strengthening exercises into your routine to provide stability and prevent wobbling in heels.
  4. Mindful Foot Placement: Pay attention to your foot placement while dancing. Be aware of the pole and the floor to ensure safe and confident movement.
  5. Practice, Practice, Practice: The more you dance in your heels, the more comfortable and confident you’ll become. Consistent practice helps you develop the necessary balance and control.

In Conclusion:

Breaking in new heels for pole dancing is a gradual process that involves patience and persistence. By following these steps and listening to your body, you’ll soon find yourself moving with confidence, grace, and style. Remember that each person’s experience is unique, so take the time you need to get accustomed to your new heels. With practice and care, you’ll step onto the pole exuding confidence and ready to shine in your pole dancing journey.

So slip into your heels, embrace the sensation, and let your pole dancing journey take on a whole new dimension of elegance and empowerment.